Friday Favourites

Oh my, it's Friday again!  Here are a few things we're loving this week...
  • Drooling over this post over on coco+kelley.  
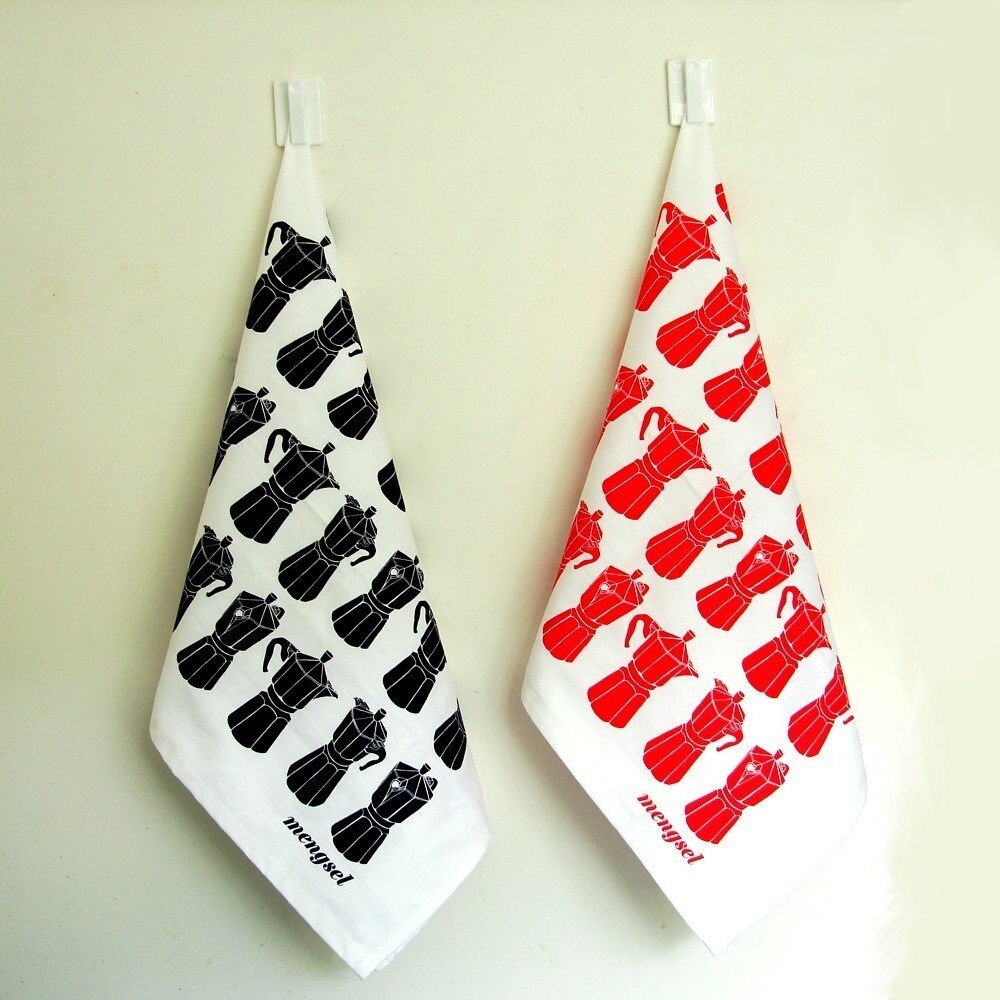
  • Loving these tea towels (almost as much as I love my morning coffee!)
Moka Express Tea Towels from Mengsel on Etsy


  • Thinking about whipping up one of these reversible bags from verypurpleperson. (But don't hold me to that, also thinking about taking a nap in a big comfy chair!)
  • Making Argentinian empanadas for lunch.  (No olives though.  We like our olives on the side!)
  • And my favourite tape project of the week?  New business cards!  Inspired by these, but simpler.


Happy weekend everyone!  See you next week for some tape-free projects!

Wedding Tape!

We happen to think that Japanese washi tapes are perfect for weddings.  Today we're sharing a few (easy) wedding DIY project ideas using mt masking tapes in a feature over on The Girl In The Pink Wedding Dress.


Take a look and let us know what you think.  Any other fab ideas for incorporating tape into your wedding look?

It's a Tape Party!

Japanese masking tape really is a perfect tool for creating a cohesive party look.  Easy to use and super versatile, we'd love to see mt masking tape used for decorating your next party (or even wedding!)

To begin with, a cute idea for bunting invitations from mer mag via iDIY .  Rather elegant in a yellow, black and white, we think these would be perfect for a baby shower using tape in playful polka dots or for a birthday party in some fun colours.


Here's a look at a great party decor concept via Project Wedding.  With a fresh turquoise and yellow colour scheme, sweet tape garlands and flags, this look would be easy to replicate.  Perfect for a shower, brunch, etc.

Why not take the tape decorations one step further and decorate a wall with tape?  Spell out HAPPY BIRTHDAY or IT'S A BOY or a simple LOVE in tape.  Celebrating a particular person, couple or milestone?  Use the tape to attach pictures to the the wall.  A quick, easy and attractive wall collage that's just as easy to remove as it is to put up.  The hardest part will be deciding which pictures to use!

image from Livingetc via Poppytalk

We'd love to see an Amy Atlas style dessert table accented with Japanese masking tape. Use the tape as cupcake / straw flags, instead of ribbon on candy vessels, to seal small bags of treats, to decorate brownie pop or candy apple sticks.  So many ways to add a little pop of fabulous tape!

via Sweet Designs by Amy Atlas

How gorgeous are these cake garlands from d-sharp?  Spotted on Poppytalk, we're thinking that you could recreate this look with Japanese masking tape.  For a wedding, birthday, shower... so lovely!


Planning a party?  Check out Omiyage's selection of gorgeous Japanese washi tapes from mt masking tape.  And don't forget, for a limited time, we'll send you a free roll of mt Deco tape when you spend $30 or more at Omiyage.

Planning a wedding? Tune in tomorrow.  We've teamed up with a great Canadian wedding blog, The Girl in the Pink Wedding Dress, to bring you a couple of great DIY projects for incorporating mt masking tape into your wedding day!

Tape Twist Ties!

Here's a cute idea just spotted on ohdeedoh.


Make your own twist ties using mt masking tape.  You can check out the how to on Zakka Life!

Taping Around the House

Here are some fast and fun ideas for using your Japanese masking tape around the house and office!

Spice up canisters and spice bottles with tape.  This would also be a great way to glam up old jars, tins, etc and give them a new life in your home:


Have some fun with your vases!  Replace ribbon with tape for a classic centrepiece look or go wild with a variety of colourful tapes for a modern vibe.


Bored of your phone / phone case?  Why not accessorize with a few washi tape stripes?  I'm absolutely loving this new look - the hot pink was beginning to lose its appeal.  A few strips of tape, and suddenly my phone feels and looks fresher! (Another bonus?  The tape makes the phone a little less slippery - helpful if you're like me and your butter fingers have led to your iPhone in your spaghetti sauce one time too many!)


Put your tape to work around the office.  Here we've used the tape as file folder labels - the tape is easy to remove, allowing these folders to be used again and again without having to scrape off old labels.  And even added a bit of flair to a Moleskin schedule book - more stripes and some monthly tabs.  So much easier to find the date!


Some other great ideas we've had / heard for using the tape around the house / office:
  • Bored of the same old picture frames?  Add mt masking tape and accessorize your frames to match your decor... or your mood!  Check out this post from Decor8.
  • Speaking of pictures, make custom magnets using photo magnets, your favourite pics and framing with Japanese washi tape.
  • Have a light shade that's missing some va va voom?  Decorate with mt masking tape for a quick and easy uplift.
  • Blank wall getting you down?  Here's a neat idea for using Japanese masking tape as a temporary wallpaper alternative.
  • Have roommates?  Use Japanese masking tape to label the stuff you don't want your roomies using up!  Same goes for whatever you stick in your office fridge!
  • You can even use this masking tape for taping stuff together or to other stuff.  Remarkable!
Whether you're arting, crafting, or just living, Japanese masking tape is fun and useful!  Want some?  We've got it!

Wrap it Up!

One of our favourite ways to use Japanese masking tape is for wrapping presents!


mt masking tape looks fabulous dressing up simple kraft paper.  Here's last week's Happy New Kitchen gift, all wrapped up and ready to go.


We also grabbed a few plain gift bags and let the tape inspire us!

First up, a simple striped bag in some vibrant summer colours:


How about dressing up a plain bag with a birthday cake and some confetti?


Or even some elegant flowers!


Let's get a close up of those flowers.


These are surprisingly easy to make, and because you're using tape, each petal can be stuck down as you go and repositioned as needed!

Have we inspired you to dress your own gifts in Japanese masking tape?  Omiyage carries mt masking tape in 52 different colours and patterns (That's one for each week of the year!)  And for a limited time, spend $30 on anything in the shop and we'll send you a free roll of mt Deco tape.  (But only while supplies last!)

It's Tape Week on Omiyage Blogs!

We are so excited to join in the Japanese Masking Tape madness!

Washi tapes from mt masking tape are lovely to look at and even better to use.  Check out these projects from the mt Gallery.

Japanese masking tape is wonderful when making your own stationery and greeting cards:


Japanese masking tape dresses up everyday objects:


Japanese masking tape is a great accent to your package design:


Japanese masking tape is a beautiful replacement for ribbon:


Japanese masking tape is a great tool for your imagination:


All week long we'll be sharing great project ideas using Japanese masking tapes.  Don't have any?  Not to worry, Omiyage carries mt masking tapes in 52 different colours and patterns! Click on over and have a look.

Friday Favourites

We've decided to wrap each week with round up of favourites.

Next week will be Japanese Masking Tape week on Omiyageblogs!  Join us for great project ideas using beautiful washi masking tape.


P.S. Did you know that we're giving mt masking tape away?  Spend $30 or more on Omiyage.ca and we'll include a free roll of mt deco masking tape!  (But only while supplies last...)


    Spotted: More Butterflies!

    Back to the origami, yet again!  Just spotted this butterfly mobile from Chez Larsson via Casa Sugar.


    Using a mobile structure is a painless way to turn origami (or anything, really) into a mobile. No painstaking balancing required!
     

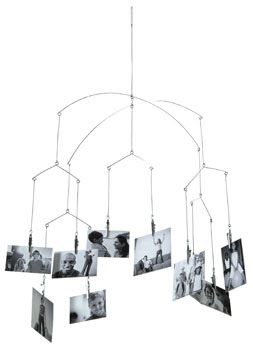
    These photo mobile ones from Kikkerland look great:


    Click on over to Chez Larsson for great instructions (and a video) on how to fold your own origami butterflies!

    See our earlier posts about origami here and here!

    Chop Chop: A Clever Little Wrap

    We promised you a little project.  Using up scraps from yesterday's apron.  And what a clever little project it is!  Can you guess what it is?


    Need a clue?  This sweet little wrap is the perfect accompaniment to your sushi to-go!


    Why a chopstick case, of course!  Carry your own chopsticks with you and say no to the disposable kind.

    And these aren't just any chopsticks.  Say hello to Ukihashi, "the restless chopsticks" from +d.


    Ukihashi's special angled tips ensure they never touch the tabletop, and that you won't need a chopstick rest!  Find them in the Dining section on Omiyage.ca

    Then again, we aren't all chopstick lovers, are we?  Don't worry, this clever little case will fit your fork, spoon and / or knife.  Forget plastic, take your own utensils when you do take out!


    Want a case of your own?  This project is oh so simple and fast!  We made ours out of Kokka Glittery Animal Damask fabric and brown bamboo jersey with a piece of ribbon to tie it all up.

    Visual learner?  Check out this picture tutorial (in Japanese) on how to make 2 cases from two 30cm / 12" squares of fabric.  Otherwise, read on:

    1. Cut two right angled triangles out of your desired fabrics.   The equal sides (what does one call those sides?  Umm, not the hypotenuse!  Or is that too math-y?) should be about 30cm / 12" long.

    2. Pin the two triangles together, right sides facing in.  If using ribbon, fold in half and pin folded end to the centre point of the triangle.  Ribbon should be sandwiched between the two pieces of fabric.  (You want the folded part to end up on the inside after stitching.)

    3. Stitch around outside of triangle.  Leave a large enough space in the sewing to turn triangles right side out.

    4. When stitching is complete, turn right side out.  Press.

    5. Hand stitch opening in triangle.  Press.

    6. Fold in the corners without ribbon.  You'll probably want to measure your chopsticks while doing this to make sure they'll fit in the finished product.  (Ours is 9" / 23cm wide with corners folded in). Press, pin and sew the corners down.

    That's it!  Simple and fast and stash-busting to boot!

    We think this case would be a great way to wrap up a special pair of chopsticks as a gift.

    A little too feminine for you?  Forget the hot pink ribbon, try a simple elastic loop and button, a leather lace or even just velcro.
    Any Occasion is an Apron Occasion!

    Around here, we like to celebrate the little things... and the not so little things too!  When a member of the family had her kitchen totally redone, we knew that a little kitchen-warming gift was in order.  Sort of a Happy New Kitchen gift, if you will!

    Around here, we are also firm believers in the power of a good apron!  We think everyone (well at least every woman) should have a beautiful apron that makes her feel good.  The kind of apron you're not embarrassed to be seen in by the postman.  The kind of apron that makes you feel like that domestic goddess you kinda sorta long to be.  Perhaps an apron to match your kitchen, or maybe one to match your eyes, or maybe simply an apron in your favourite colour!

    Handcrafted (sounds much posher than homemade, doesn't it?) aprons have become our gift of choice when attending a bridal shower, or a housewarming, so a Happy New Kitchen apron seemed like the perfect thing for this occasion.


    I know, I know!  Enough rambling, on to the eye candy...


    A simple apron using our Kokka Glittery Animal Damask in brown.  Traditional print with a bit of a surprise!  We love this shape for an apron, it keeps the apron womanly without ruffles and other fiddly bits.  D-rings are used for the neck strap for easy adjustment. Extra long ties allow you to secure this apron in the front (our preference) or in a lovely big bow at the back. We used 1 metre of the Kokka Animal Damask and have a smidge left over for another little project!


    The same apron in a lovely Ikea canvas print. (We do love Ikea fabric, perfect for aprons and so affordable!  Check out the fabric section next time you're in an Ikea; the selection isn't huge, but there's usually some interesting patterns available).  This time we've added some chunky lace trim and some buttons.  Simple additions take this apron up a notch.  We've stitched the neck strap right on and sewn on the buttons - purely decorative.  But oh, how decorative they are...


    Gotta love a good button!  These lovelies (and the lace) were found at our local Fabricland and their subtle but special design are the perfect accent to this apron.

    And of course, we just had to make a mini version too!


    The same pattern with a few special details all her own.  From a teeny pocket for tiny treasures to a more traditional style of lace trim.  And even...


    A secret inscription!

    Inspired to make your own apron, for yourself or as a gift?  Here you can find a round up of apron tutorials from around the web.  Here's a blogger full of apron love. Don't be afraid to mix and match and play until you find your own perfect pattern!  And if you love that Kokka Animal Damask as much as we do, you can find it in Omiyage's fabric section (with lots of other fabulous Japanese fabrics).